| This manual is deprecated. Please visit https://groupoffice.readthedocs.io for the latest documentation. |
Difference between revisions of "Addresslists and newsletters"
(→Sending newsletters / mailings) |
|||
| Line 9: | Line 9: | ||
Addressbook -> Administration -> Addresslists | Addressbook -> Administration -> Addresslists | ||
| − | You can add contacts in that dialog | + | You can add contacts in that dialog: |
| + | |||
| + | [[Image:Select-addresslist-at-contact.png]] | ||
| + | |||
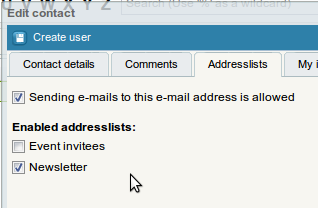
| + | Or you can check multiple lists at the "Edit contact" dialog: | ||
| + | |||
| + | [[Image:Add-contacts-at-addresslist.png]] | ||
| + | |||
| + | |||
| + | ===Filtering on addresslists=== | ||
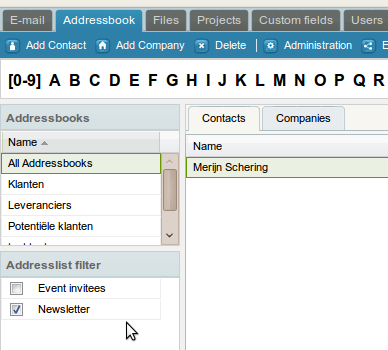
| + | Once you created some addresslists a filter appears at the left in the addressbook. This is useful to quickly view the contents of a list: | ||
| + | |||
| + | [[Image:Addresslist-filter.png]] | ||
| + | |||
===Sending newsletters / mailings=== | ===Sending newsletters / mailings=== | ||
| Line 19: | Line 32: | ||
Select a template if you have created one and select the list to send the newsletter too. Now simply compose your e-mail like you would do with a normal e-mail and click at send. | Select a template if you have created one and select the list to send the newsletter too. Now simply compose your e-mail like you would do with a normal e-mail and click at send. | ||
| − | Datafields in the template will be replaced with data from the | + | Datafields in the template will be replaced with data from the addressbook so you can created personalized e-mails. |
A background process will send the e-mails. It will send it slowly so it won't bring the server down. You can check the progress at: | A background process will send the e-mails. It will send it slowly so it won't bring the server down. You can check the progress at: | ||
Addressbook -> Administration -> Addresslist -> Doubleclick the list and click at Sent mailings | Addressbook -> Administration -> Addresslist -> Doubleclick the list and click at Sent mailings | ||
| + | |||
| + | [[IMageMailing-status.png]] | ||
<b>Note:</b>You can also simply select the list from the addressbook at the e-mail composer. This is useful for small lists only. | <b>Note:</b>You can also simply select the list from the addressbook at the e-mail composer. This is useful for small lists only. | ||
Revision as of 15:29, 28 December 2009
Addresslists are useful for:
- Sending newsletters
- Categorize contacts because you can filter on them too
- Send an e-mail to this list
To create a list go to:
Addressbook -> Administration -> Addresslists
You can add contacts in that dialog:
Or you can check multiple lists at the "Edit contact" dialog:
Filtering on addresslists
Once you created some addresslists a filter appears at the left in the addressbook. This is useful to quickly view the contents of a list:
Sending newsletters / mailings
To send a newsletter go to:
Addressbook -> Send mailing
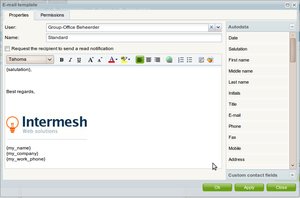
Select a template if you have created one and select the list to send the newsletter too. Now simply compose your e-mail like you would do with a normal e-mail and click at send.
Datafields in the template will be replaced with data from the addressbook so you can created personalized e-mails.
A background process will send the e-mails. It will send it slowly so it won't bring the server down. You can check the progress at:
Addressbook -> Administration -> Addresslist -> Doubleclick the list and click at Sent mailings
Note:You can also simply select the list from the addressbook at the e-mail composer. This is useful for small lists only.
Using a special SMTP server
If you want to use a different SMTP server to send all mailings you can set the following config variables:
$config['mailing_smtp_encryption']="ssl";//empty, ssl or tls
$config['mailing_smtp_server']="smtp.bulkmail.com";
$config['mailing_smtp_port']="25";
$config['mailing_smtp_username']="";
$config['mailing_smtp_password']="";


